Documentation
Everything you need to know about using ScreenToPrompt to annotate screenshots and generate AI-ready prompts.
Getting Started
ScreenToPrompt is a Chrome extension that lets you capture any webpage, annotate it with visual tools, and generate a precise AI prompt describing your changes. Here's how to get started:
Capture Modes
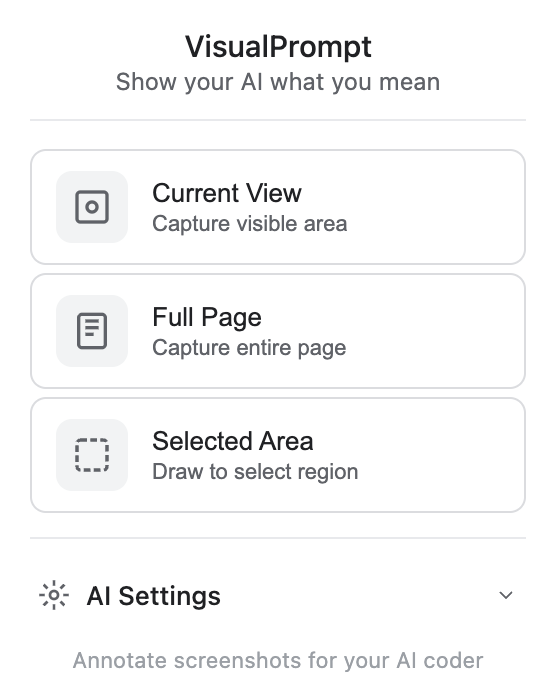
When you click the ScreenToPrompt icon, you'll see three options:
- Current View — Captures exactly what's visible in your browser window. Fastest option for quick annotations.
- Full Page — Scroll-captures the entire page from top to bottom. Opens in a pan & zoom viewer so you can navigate large pages easily.
- Selected Area — Lets you draw a rectangle to capture just the part of the page you need.
The Toolbar
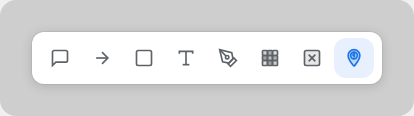
After capturing a screenshot, the annotation toolbar appears at the bottom of the screen. It contains all the tools you need to mark up your screenshot.

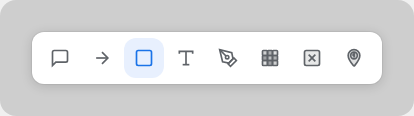
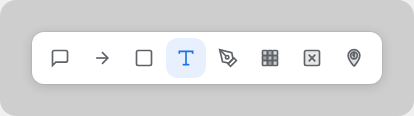
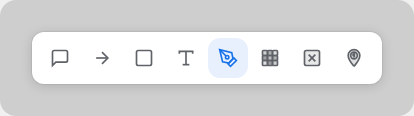
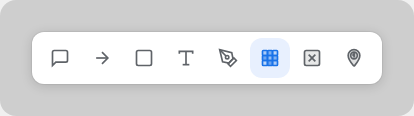
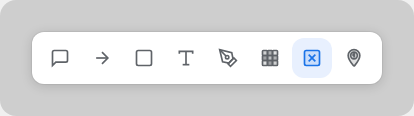
From left to right, the toolbar contains:
- Comment — Add a comment with a text label attached to a rectangle area
- Arrow — Draw arrows to point from one element to another
- Rectangle — Highlight areas with rectangles (stroke, filled, or dashed)
- Text — Place text labels directly on the screenshot
- Sketch — Freehand drawing for circles, lines, and X marks
- Blur — Pixelate sensitive areas like passwords and API keys
- Erase / Cover — Cover areas with a matching background color
- Number Marker — Place numbered crosshair markers for step-by-step instructions
- Color Picker — Select the active color for your annotations
- Annotation Select — Click an annotation to select, move, resize, or edit it
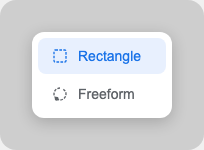
- Screenshot Select — Select a region of the screenshot to move, copy, or delete. Click the dropdown arrow to switch between rectangle and freeform lasso modes.
- Undo — Undo the last action
- Clear All — Remove all annotations
- Markups / Layers — Open the layers panel to manage individual annotations
- Copy — Copy the annotated screenshot to your clipboard as an image
- Prompt — Generate an AI prompt from your annotations
- Close — Close the annotation editor
Some toolbar buttons have dropdown menus. For example, the Screenshot Select tool lets you choose between Rectangle and Freeform selection modes:
Annotation Tools
When you select an annotation, a toolbox appears in the top-right corner with options specific to that annotation type.
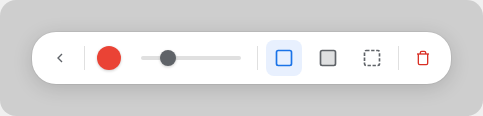
The toolbox lets you change color, adjust size with a slider, switch between stroke/fill/dashed styles (for rectangles), and delete the annotation. Click the back arrow to deselect.
Arrows
Click and drag to draw an arrow from point A to point B. Great for showing where elements should move to. The AI interprets arrows as "move this element here" instructions.
Rectangles
Click and drag to draw a rectangle around any area you want to highlight. Switch between stroke (outline), filled (semi-transparent), and dashed styles using the toolbox buttons.
Text
Click anywhere on the screenshot to place a text label. Type your instruction (e.g., "remove", "bigger", "change to blue") and the AI will interpret it in context. Text supports up to 400 characters.
Comments
Click and drag to draw a rectangle, then type your comment. The text appears directly below the rectangle. Use comments for detailed change instructions like "change this button to blue with rounded corners".

Curved Comments
An advanced comment style with a curved bezier connector between the rectangle area and the text label. The text can be dragged independently, and the comment parts can be sub-selected like in Figma. Choose this for more precise placement control.
Sketch
Draw freely on the screenshot. Circle elements to highlight them, draw an X to mark something for deletion, or sketch lines to show connections. The AI interprets common drawing patterns automatically.
Blur
Click and drag to blur sensitive areas. Pixelates API keys, passwords, emails, and other personal data before sharing screenshots with AI. Essential for privacy when annotating settings pages.
Erase / Cover
Cover areas with a solid color to completely hide content. Unlike blur, erase fills the area with a flat color. Use the eyedropper to pick a matching background color for seamless coverage.
Number Markers
Click to place numbered crosshair markers. Each marker automatically increments the number. Use them to create step-by-step instructions where each number points to a specific element. The precision crosshair helps the AI identify exactly which element you're targeting.
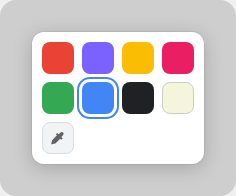
Eyedropper
Pick any color from the screenshot to match your design system. Available in both the main toolbar color palette and the per-annotation toolbox. Click the eyedropper button, then click anywhere on the screenshot to sample a color.
AI Prompt Generation
The Prompt button is the core feature of ScreenToPrompt. When you click it, AI analyzes your annotated screenshot and generates a detailed, structured prompt describing every change you've marked.
The AI understands visual context:
- Text labels are read as direct instructions ("remove", "bigger", "change to blue")
- Arrows are interpreted as "move this element here"
- Sketches — an X means "delete", a circle means "highlight this"
- Comments provide detailed instructions tied to specific areas
- Number markers create step-by-step sequences
After generating, you have two copy options:
- Copy Text — Copies the generated text prompt to your clipboard. Paste it into any AI chat.
- Copy as Image — Merges the annotated screenshot and the prompt text into a single image. Paste it directly into AI tools that support image input.
The prompt panel has two modes:
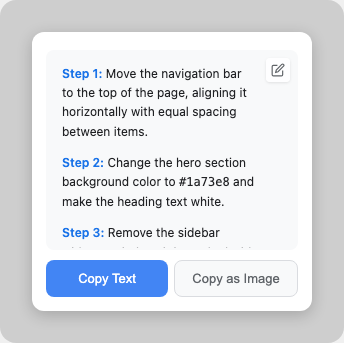
In read mode, the generated prompt is displayed with formatted text. Click the pencil icon to switch to edit mode.

In edit mode, you can modify the prompt text freely. Click the checkmark to save or the X to cancel your edits.
AI Setup
To generate AI prompts, you need to connect an API key from one of the supported providers.
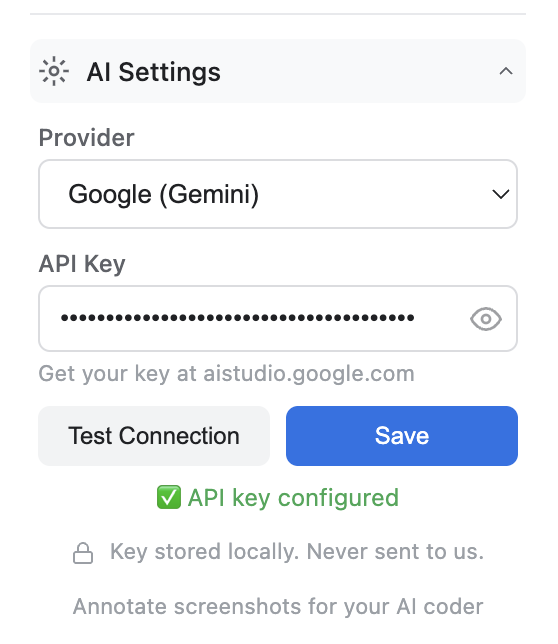
To access AI settings, click the extension icon and expand the "AI Settings" section at the bottom of the popup.
Privacy: Your API key is stored locally in your browser using Chrome's built-in storage. It is never sent to ScreenToPrompt servers (we don't have any). When you generate a prompt, your browser communicates directly with the AI provider's API.
Get a Free API Key (Google Gemini)
Don't have an API key? Google offers a free tier for the Gemini API — no credit card required. This is the easiest way to start using ScreenToPrompt's AI prompt generation at no cost.
What you get for free:
- Free of charge — no usage fees for the prompts you generate with ScreenToPrompt
- No monthly fee and no credit card required to get started
- Rate limits apply (requests per minute and tokens per day) but are more than enough for typical ScreenToPrompt usage
Good to know:
- The free tier is intended for personal use, testing, and small projects. If you hit rate limits, wait a minute and try again.
- Google also offers a pay-as-you-go tier with higher limits if you enable billing on your Google Cloud project. You only pay for what you use beyond the free allowance.
- Your API key is stored locally in your browser and sent only to Google's API. ScreenToPrompt never sees or stores it. See Google's Privacy Policy for how they handle API requests.
For full pricing details, see Google's Gemini API pricing page.
Keyboard Shortcuts
Speed up your workflow with these keyboard shortcuts while the annotation editor is open:
| Action | Shortcut |
|---|---|
| Undo | Ctrl + Z / ⌘ + Z |
| Delete selected annotation | Delete / Backspace |
| Deselect / Cancel | Escape |
| Nudge selected annotation | ↑ ↓ ← → |
| Large nudge | Shift + Arrow keys |
| Copy annotated screenshot | Ctrl + C / ⌘ + C |
| Zoom in (full page mode) | Ctrl + + / ⌘ + + |
| Zoom out (full page mode) | Ctrl + - / ⌘ + - |
| Reset zoom | Ctrl + 0 / ⌘ + 0 |
Layers Panel
The Layers panel (click the Markups button in the toolbar) shows every annotation on your screenshot in a list, similar to the layers panel in Figma.
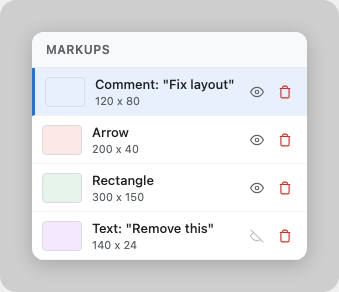
In the layers panel you can:
- Select — Click any layer to select and highlight the annotation on the screenshot
- Reorder — Drag layers to change their stacking order
- Toggle visibility — Click the eye icon to show or hide individual annotations
- Delete — Click the trash icon to remove an annotation
Each layer shows a thumbnail preview, the annotation type and content, and its dimensions.
FAQ / Troubleshooting
Why does the Prompt button say "Add API key in extension settings"?
You need to configure an AI provider API key first. Click the extension icon, expand "AI Settings", choose a provider, paste your API key, and click Save. See AI Setup for details.
Which AI providers are supported?
ScreenToPrompt supports OpenAI (GPT-4o) and Google (Gemini). Both can analyze screenshots and generate prompts. Google offers a free tier — see Get a Free API Key to get started at no cost.
Is my data sent to ScreenToPrompt servers?
No. ScreenToPrompt has no servers. Your screenshots never leave your browser until you copy them. When you generate a prompt, your browser communicates directly with your chosen AI provider. Your API key is stored locally in Chrome's sandboxed storage.
How do I annotate a full-page screenshot?
Choose "Full Page" in the capture popup. The entire page will be scroll-captured and opened in a pan & zoom viewer. Use mouse wheel or the zoom controls in the toolbar to navigate. All annotation tools work the same way.
Can I edit an annotation after placing it?
Yes. Switch to the Annotation Select tool (cursor icon) or click the annotation directly. The toolbox will appear letting you change color, size, style, and delete. Double-click text or comments to edit the content.
How do I match a color from the screenshot?
Open the color palette by clicking the color circle in the toolbar. Click the eyedropper button at the bottom of the palette, then click anywhere on the screenshot to sample that color. The eyedropper is also available in the per-annotation toolbox.